Becky’s Essence of Fruit (Recipe Inside!)

Recently, supermarkets in Sydney have stopped stocking fruit-flavoured extracts and essences because teenagers have been buying them in bulk and scoffing them to get drunk.

Since I love baking cakes, this has posed a problem for me, since I can’t even get vanilla essence anymore for baking!  The solution?  Make my own flavoured essence, of course!  After consulting with a few friends, and looking up a few references, I was ready to embark on my essence making journey.

Ingredients (berry essence):

  • 250 g berries
  • 250 ml vodka
  • 500 ml glass preserving jars
  • 6 to 8 weeks of time

Becky’s Note: In order to get the best results, I highly recommend using a vodka that’s as close to flavourless as possible.  The more distillation and filtration, the better!  Absolut Vodka is pretty good for this, though I’ve heard that pricier alcohols like Grey Goose and Belvedere are good as well.

Delicious glass and metal soup

Delicious glass and metal soup

Step 1:  Sterilise the Jars

Open the jars, fill them with boiling water, then immerse them and the jar lids in a pot of boiling water and boil for about 15 minutes.  This will get rid of any nasty bacteria that may be hanging around.  The alcohol will take care of the rest.

Make sure that you use tongs when removing the jars from the hot water.

Dump out the water, then use a clean towel to dry the jars and lids up.  Make sure that the jars are completely dry before use.

Cuttin' up the Strawberries

Cuttin’ up the Strawberries

Step 2: Prepare the Fruit

For most berries, I recommend dicing up the fruit so that each piece is roughly 1 cm big.  This will increase the surface area for the alcohol to leech out the berry flavour and juices.

For blueberries, however, don’t bother cutting them up, simply use the tip of your knife to poke a small hole in the skin of each blueberry.

If you’ve got a 500 ml jar, you can just put the berry pieces into the jar and top the jar up with vodka.  However, if you don’t have such a small jar, then make sure to measure the vodka out carefully, as the 1:1 ratio of vodka to fruit is very important.

The essential ingredients!

Becky’s Note: Should you decide to drink some of the vodka at this stage, please be warned that vodka is 40% alcohol by volume.  Make sure to eat something and drink lots of water as well!

Step 3: Put Away for 6 to 8 Weeks

Screw the lids of the bottles on tightly and put the essence bottles away in a cool, dark place for 6 weeks.  Do NOT expose the essence bottles to light if you can help it!  This can really ruin the flavour!

A trio of fruit!

A trio of fruit!

Becky’s Note:  As you can see in this picture, I’ve made lemon essence as well!  Making essence out of citrus fruit entails a whole different process – instead of 250g of fruit, you’ll need the zest of about 1 kg of lemons for every 250 ml of vodka you use.  The resulting jar is therefore less full of liquid, as lemon zest takes up a lot less space and is more potent than the berries.

Over time, the liquor should gain more of the colour of the fruit, while the fruit loses its colour as the flavour is leeched out by the vodka.

Step 4: Filter out the fruit and bottle the essence in smaller jars!

After 8 weeks, take the bottles out and filter the fruit out!  You can now bottle the results up for baking and cooking!

Gardening Update: Strawberries and Punkin

It’s been a while since I last wrote about my garden, so I thought I’d give you all an update!  It’s been going more than reasonably well and growing in a manner reminscent of a cartoon or video game.

Herb Pots: Coriander, Chilli and Garlic Chives

Herb Pots: Coriander, Chilli and Garlic Chives

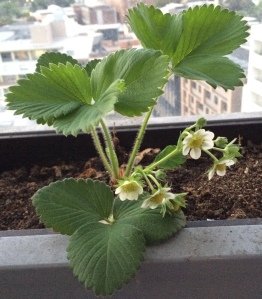
After many weeks of only putting out deep green leaves, the strawberry plant finally started getting serious about the whole making fruit thing and popped into about five flowers.  That was this morning.  The following photograph was taken at about 5 PM today.  Only three of the five flowers remain, the other two have turned into large green fruit.  It’s like Minecraft!  I can’t wait for the fruit to ripen!

Fruitsplosion!

Fruitsplosion!

Meanwhile, the cheap tumbling compost bin that I purchased finally gave up the ghost.  The plastic on the bin wasn’t properly treated for Australian weather and started to degrade under the ultraviolet light.  The bolts on it couldn’t handle the stress of being tumbled daily.  It started to split two weeks ago and it wouldn’t be long before the whole bin broke and poured compost all over my balcony.  Plus, the Herculean effort needed to spin the bin each day was starting to make my back hurt from the strain.

At the same time, the pumpkin plant was starting to get root bound from being in the tiny pot I had originally put it in.  Pumpkins need a lot of space to grow and plenty of water and sun.  Heck, most gardening guides recommend that you just build a huge mound of dirt and let the pumpkin just grow all over it.  Since I didn’t have the luxury of building a “huge mound of dirt”, I decided to kill two birds with one stone.

First, I bought a brand new compost bin, a fancy UV-protected, glass-reinforced bin with a crank on the side!  No more backaches for me!

After moving some of the compost from the old bin into the new one, I cut the old compost bin in half and turned it into a mega-pot for the pumpkin!  It’s been thriving ever since.

It got a little tall, so I've put a tomato cage in to keep it growing straight

It got a little tall, so I’ve put a tomato cage in to keep it growing straight

There’s a lot of little pumpkin flowers at the base too, and the soil’s very rich, perfect for growing.  I’m really looking forward to the fruits of my labour.

Boobook has promised me a veggie patch when we move into our new home together.  I’m looking forward to being able to plant vegetables without the constraints of pots.

Spring Planting: How to Transplant a seedling

Red Bravo strawberries after 10 days of planting

Red Bravo strawberries after 10 days of planting from seedling

IT IS SPRIIIIIIIIIIINNNNNNGGGG!

The dirt in the vermicomposter has been noshed on all Winter and is now heavy with nutrients and little red wigglers.  The local supermarkets are starting to sell plants by the dozen.

Which means that…

IT IS TIME FOR PLANTING!  (Woo hoo!)

This year, I’m planting some strawberries and pumpkins, the latter of which I got for free at the local cafe.  I’m really looking forward to a fruitful harvest.  Later, when the worms have completed more work, I’ll be planting some parsnips, which hopefully won’t shoot to seed straight away.  And, of course, eggplants, because eggplants are delicious when grilled with miso.

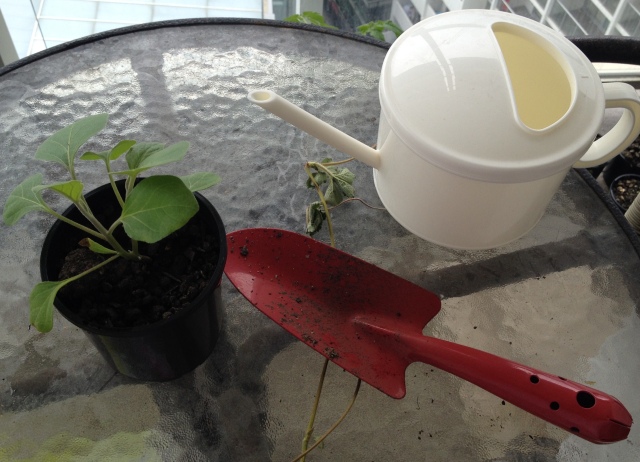
I usually try to grow my plants from seed, which means that before getting put into the main pot, they spend some time germinating in a small plastic germination pot.  When the roots grow out from the bottom of the germination pot, it’s time for transplanting!

An eggplant plant ready for transplanting

An eggplant plant ready for transplanting

Step 1:  Dig a Hole

FullSizeRender_1The first step to transplanting something is, of course, to dig a hole deep enough to put the plant in.  You will want to make it about 1-2 inches deeper and larger than the pot to make space for the roots.

Step 2:  Take off the Pot

FullSizeRender_3Next, remove the plant from the pot.  If it’s properly ready for transplanting, the plant’s roots should hold tightly to the soil in the pot.  This should make it easier to remove from the pot and it should come out smoothly.

Squeeze the soil at the bottom lightly to loosen the roots and the dirt before putting it into the soil.  You should cover up any exposed roots with dirt.

Step 3: Water liberally

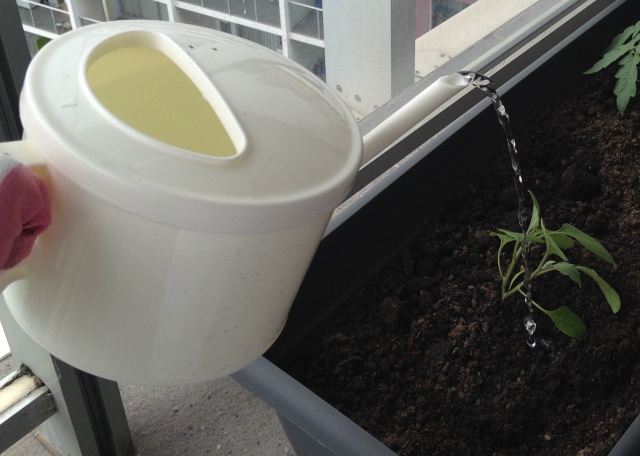
FullSizeRender_4Finally, water the plant liberally until the soil has packed around the roots!

Make sure that the plant is kept in half sun for a few days before putting it in full sun, as transplanted plants tend to be a little fragile!

If you’re really into making lots of crop plants, you can look into companion planting, where two plants sharing the same pot don’t use the same nutrients to grow, thus helping each other grow!

Tomato and Eggplants together, not the best companions, but still suitable

Tomato and Eggplants together, not the best companions, but still suitable

Enjoy your spring planting!